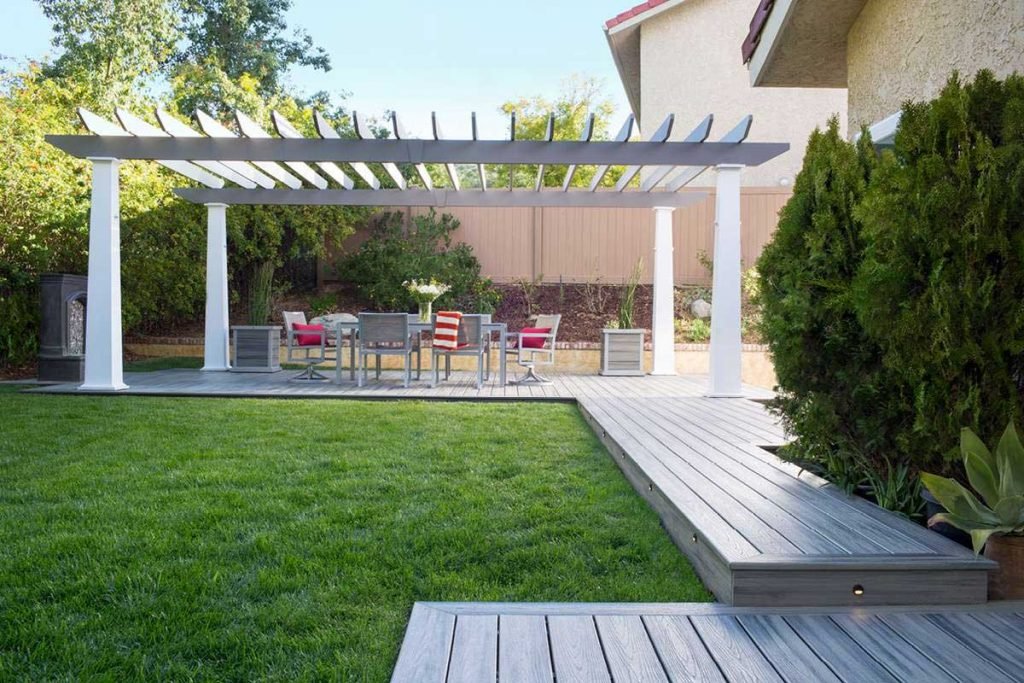
These decks are typically low to the ground with a fascia board all the way around to make it look like they are floating.
They are built just close enough to the ground that you don’t need a handrail for safety or steps to get on and off, allowing for access 360 degrees around the deck. Besides functionality, the deck is a great way to improve the aesthetics of your backyard with a break from all the plants and grass you may have now.
The tools you’ll need are: a circular saw, chalk line, hand saw, tape measure, carpenter’s level, power drill and the right hardware. If this sounds like the ideal addition to your backyard, here are some simple tips on how to build an island deck.
Location
Start by putting a plan together for your deck. This all starts by selecting the location in your yard where you want the deck.
To truly be an island deck it will need to be away from other structures, but also somewhere you like to chill. Ideally, the area wouldn’t have too much of an elevation change, so it doesn’t get too high off the ground. Then you need to decide how big to make it.
The bigger it is, the more space you have to party but at the same time, the more expensive and laborious the project gets. It is also simplest to keep the deck square or rectangular, so you don’t have to deal with curves. Now it is time to start buying wood and building your deck.
Posts
While the deck shouldn’t be very far off the ground, you still need to support it in some way. This will give you a sturdy structure to build off and will keep the wood of your deck off the ground.
On a standard deck, you need a support post or footer every 8 ft but if you plan on adding heavy loads to your deck, you may want to decrease that distance and add more posts.
It is also recommended that you concrete your posts if you plan on using 4×4 beams, this will keep them from sinking farther or shifting. Your local hardware store will have a variety of options you can use as footers for your deck.
Beams
The next major task is to run your beams that will support the floor structure. These beams are basically the largest boards in the deck and spread the load to all of the posts. For small decks, you can get away with just two beams on each side but far larger decks you may need to increase this.
To keep the island appearance, you will want to keep these a few feet from the edge on each side. The typical beam consists of 2 2x8s attached together to create a 4×8. You can do the same thing with a few 2×6’s or 2×10’s if you need the deck to be stronger or if it’s smaller. It is important to make sure the beams are level both down the individual beam as well as from beam to beam as this sets your surface.
Joists
The Joists set the structure for the boards you walk on. This is also the level where you want to hide the inside structure. The typical joist spacing on a deck is 16 inches. Here you want to use 2x8s as well but leave them singular.
Run these over your two beams and attach a 2×8 across the front of each one so basically make a bunch of small rectangles inside the perimeter shape of your deck. You will also want to attach these to your beams. For this, you can find metal brackets at your local hardware store so you get a stronger connection than you would if you were to just toenail the joint.
If you are running a distance longer than one board, make sure you have the joists overlap at a beam, so you maintain maximum strength.
Boards
Next, you lay the boards across the top to create the surface you will stand on. For this, you will use 2×6’s. Start on one end and work towards the other.
I like to stick a nail through a couple of boards to act as a spacer between each board when I am putting them down, this allows rainwater to pass through as well as the boards to swell. Use exterior deck screws or a nail cut and attach the boards to each joist as you work the way down.
Similarly, to the joists, you will want to have any boards that butt together on top of a joist so you don’t have two ends that will sag down when stepped on.
This is basically all there is to build an island deck. Painting it accordingly will help it get protected and will surely last for years. Depending on the wood you used, you may want to stain or seal the boards to protect them from the sun and rain but that’s up to you.
Author Bio:
Brandon Smith is an Editor at TheSawGuy.com – a woodworking & DIY resource for everything from comparing the best table saws and miter saws, down to home and garden projects.

